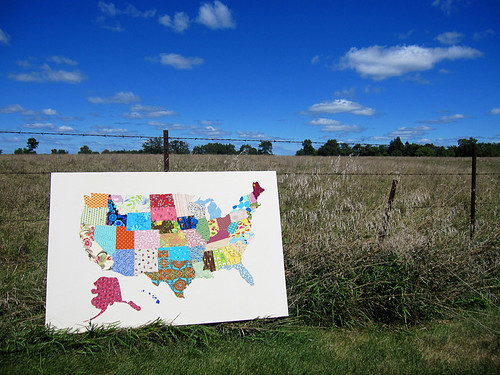
This is probably in my top 10 favorite things I have ever made. It all started with this pin on Pinterest. Original map is by See Kate Sew, with a nice tutorial here. I loved the look of this fabric map and had been looking for a large art idea to hang in our great room.
I'm not posting a full tutorial or anything, but I will share my basic process:
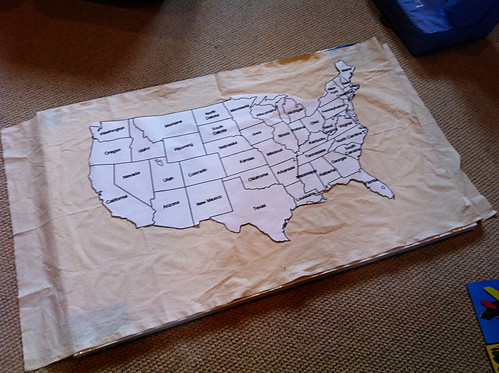
1. find USA map outline via google
2. take map to copy center to be enlarged (I told them the final width I wanted in inches and they figured out the enlargement %)
3. buy 40" x 60" stretched canvas
4. make sure the size of the map will work for the canvas size
5. cut apart all the paper states
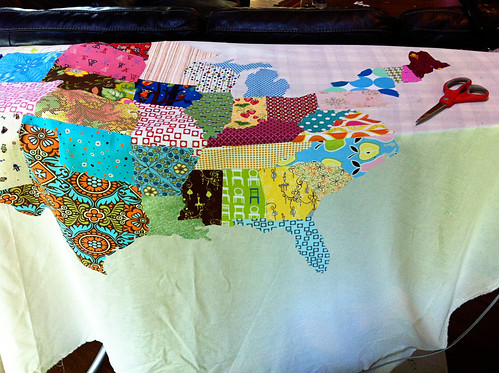
6. collect 50 different fabrics for the states (all from my fabric scrap stash)
7. iron fusible interfacing on the back of the fabric scraps
8. cut out each state from a different piece of interface-backed fabric.
9. iron states onto a large piece of muslin fabric (I started with California and worked my way east, puzzle-style)
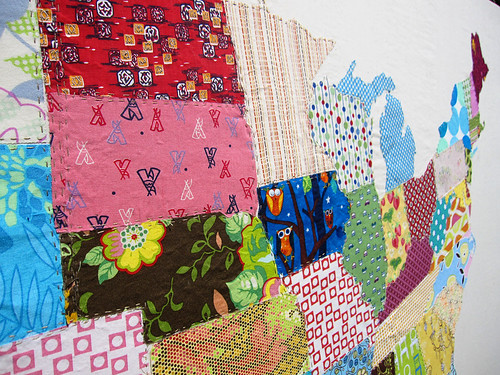
10. hand-stitch around the inside edge of each state. I did this to make the fabric states more secure, add texture, and also to tie the design together with a single color of embroidery floss. It did take longer to hand-stitch than it would have to machine-stitch them, but I think it was easier. Also, it added to the rustic/folk art style I was going for.
11. iron the entire piece again, then stretch and staple (using a staple gun) the muslin around the canvas
A few things -
- The canvas was much more expensive than I anticipated, but I got it when they were running a sale at the art store, so that helped.
- On the other hand, the fabric pieces were all free, since they all came from my fabric stash left over from other projects. I love seeing them all together on the wall because they remind me of the other handmade things they are part of.
- I started hand-stitching the states while the muslin was stretched in a large embroidery hoop, but eventually left the hoop behind and just held the fabric loosely while I made the running stitches.
- The final stretched piece has some wrinkly/puckered spots that I think are due to some funky tension while I was ironing and sewing the states (see lack of hoop, above). I'm trying not to let it bother me, but I wish the background was perfectly smooth.
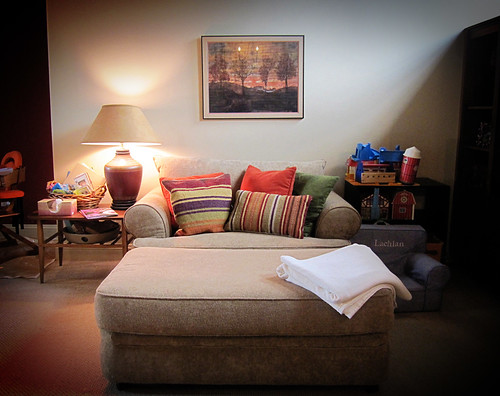
Here is the corner that needed a new art piece, something more substantial, before:
And the same spot (plus my newly spray painted table!), after:
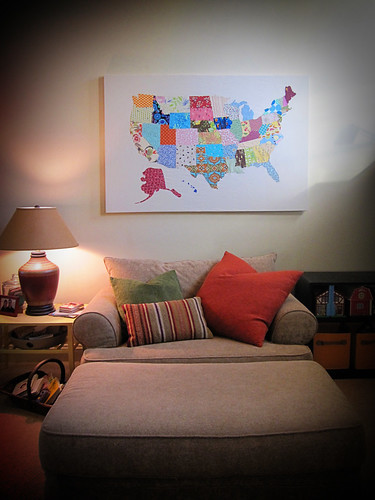
So, yeah. It was a big project that took me months to complete (working in small chunks, of course). That said, I am super happy with the finished product and look forward to living with it for many years to come.
Love it! Looks perfect in its cozy corner.
ReplyDeletethat's awesome! what a fun project.
ReplyDeletegreat work!! i love it :)
ReplyDeleteLooks perfect there! It was meant to be there, for sure!
ReplyDeleteThis is SO fabulous Kirsten!
ReplyDeleteI am IN LOVE!!!!!
ReplyDeleteAmazing! What is your finished size?
ReplyDelete