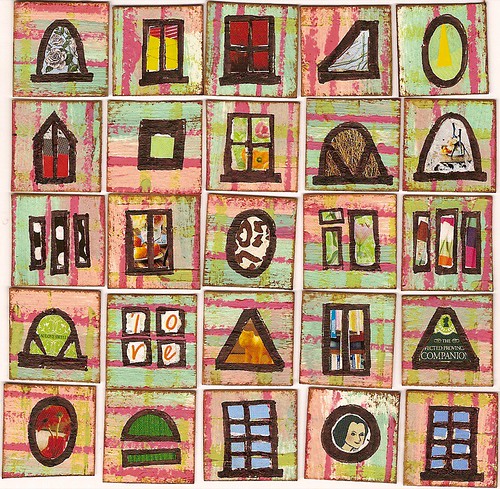
Here are my first 25 squares with a little embellishment. I started by drawing the little windows with brown pen, then I inked the edges with Distress Ink, and painted in the "panes" with gesso. Finally, I found tiny pictures in a magazine and to attach inside the windows. i really think they need a little something more, but I don't know what...
I love the idea of the windows. I think you're really brave to attempt these 1" squares. I was scared to. I see what you mean about needing something else - maybe it is because each object is centered in the square and your eye doesn't travel around it. Or we are just used to seeing really busy pieces of art and this is more restful. I like it myself.
ReplyDeleteThe colors are so yummy! And I love the window concept. Maybe they need to be edged? You know, a border, just a thin irregular edge that complements the windows, frames the piece...maybe in a brick red or someother color that works well with the palette?
ReplyDeleteJust an idea...I think they are delightful either way!
I love these. I thought the same thing as Nici: they need a border of some sort. Or perhaps a little doodle-flourish that starts off the focal point and then goes up and onto it.crapauds
ReplyDeleteIt's really hard to critique someone else's when you struggled with them yourself. I wasn't sure mine were "done" either. But I love yours! They look awesome together like that. I think they're very interesting.
ReplyDeletei love them perfect!!!!
ReplyDeleteAng
I Think you should sew on the edges! THey are fantastic- great paper you made to create these!
ReplyDelete